蓋莫游戲引擎2.1.1的地形小例
代碼如下:
1 #include <GEngine/Gaimo.hpp>
2
3 using namespace std;
4 using namespace core;
5 void RotateView(float angle, float x, float y, float z);
6 //! 處理鍵盤響應(yīng)
7 void KeyCheck(RefPtr<Input> input);
8 RefPtr<Camera> camera;
9 RefPtr<Text> font;
10 char textbuf[20]="";
11 float yrot=0.0f;
12 float dv=0.0f;
13 int Main()
14 {
15 //! 初始化引擎設(shè)備并得到設(shè)備指針
16 RefPtr<Device> device = InitDevice("地形測(cè)試");
17 //! 得到引擎場(chǎng)景指針
18 RefPtr<SceneManager> scenemanager = device->GetSceneManager();
19 //! 得到引擎資源指針
20 RefPtr<ResourceManager> resourcemanager = device->GetResourceManager();
21 //! 獲取圖形管理器指針
22 RefPtr<ImageManager> imagemanager = resourcemanager->GetImageManager();
23 //! 得到視頻驅(qū)動(dòng)器指針
24 RefPtr<VideoDriver> videodriver = device->GetVideoDriver();
25 font= resourcemanager->GetTextManager()->CreateText("heiti","黑體",16);
26
27 //! 得到地形
28 RefPtr<Terrain> terrain = scenemanager->GetTerrain();
29 //! 載入高程圖
30 terrain->LoadHeightMap("..\\terrain\\terrain.raw",1024,16);
31 //! 獲取地形圖形指針
32 RefPtr<Image> mainimage = imagemanager->CreateObject("mainimage", "..\\terrain\\terrain.bmp");
33 RefPtr<Image> detailimage = imagemanager->CreateObject("detailimage","..\\terrain\\detail.bmp");
34
35 //! 獲取紋理管理器
36 RefPtr<TextureManager> texturemanager = resourcemanager->GetTextureManager();
37 //! 獲取紋理指針
38 RefPtr<Texture> maintexture = texturemanager->CreateTexture("maintex",mainimage);
39 RefPtr<Texture> detailtexture = texturemanager->CreateTexture("detailtex",detailimage);
40 terrain->LoadTexture(maintexture,detailtexture);
41
42 //! 獲取攝像機(jī)指針
43 camera = scenemanager->GetCameraManager()->CreateCamera("camera",Vector3f(300,10,300),
44 Vector3f(10,10,0));
45 camera->SetViewPort(Recti(0,0,640,480));
46 camera->SetPerspective(45.0f,640.0f/480.0f,0.1f,600.0f);
47
48 device->GetVideoDriver()->EnableCulling();
49
50 //! 獲取霧指針
51 RefPtr<Fog> fog = resourcemanager->GetFog("..\\script//fog.lua","fog");
52 fog->Render();
53
54 Vector3f camera_pos,camera_view;
55 BEGIN_LOOP(device)
56 videodriver->SetClearBuffer(ENGINE_CLEAR_COLOR | ENGINE_CLEAR_DEPTH);
57 camera->Render();
58 terrain->Render();
59
60 KeyCheck(device->GetInput());
61
62 camera_pos = camera->GetPosition();
63
64 sprintf(textbuf,"camerapos:(%f,%f,%f)",camera_pos.x,camera_pos.y,camera_pos.z);
65 font->Render(10,15,textbuf);
66 camera_view = camera->GetView();
67 sprintf(textbuf,"cameraview:(%f,%f,%f)",camera_view.x,camera_view.y,camera_view.z);
68 font->Render(10,35,textbuf);
69 RotateView(yrot,0.0f,1.0f,0.0f);
70 camera->MoveCamera(dv);
71 sprintf(textbuf,"nowheight:%f",terrain->GetAveHeight(camera_pos.x,camera_pos.z));
72 font->Render(10,55,textbuf);
73 camera_pos = camera->GetPosition();
74 camera->SetPosition(Vector3f(camera_pos.x,terrain->GetAveHeight(camera_pos.x,camera_pos.z)+30,camera_pos.z));
75 //! 保持視線水平
76 camera_view = camera->GetView();
77 camera->SetView(Vector3f(camera_view.x,terrain->GetAveHeight(camera_pos.x,camera_pos.z)+30,camera_view.z));
78 dv = 0;
79 END_LOOP(device)
80 return 0;
81 }
代碼看似很多
其實(shí)很多代碼都是簡(jiǎn)單的取指針操作
下面是貼圖

 這是蓋莫游戲引2.1.1的鏡頭光功能測(cè)試
可以看出蓋莫游戲引擎隨著開發(fā)的不斷深入功能越來(lái)越強(qiáng)大了
首先上鏡頭光的代碼
////////////////////////////////////////////////////////////
/// 定義引擎鏡頭光類
////////////////////////////////////////////////////////////
class LensFlare : public Renderable
{
public:
////////////////////////////////////////////////////////////
/// 鏡頭光構(gòu)造函數(shù)
////////////////////////////////////////////////////////////
LensFlare(){}
////////////////////////////////////////////////////////////
/// 鏡頭光析構(gòu)函數(shù)
////////////////////////////////////////////////////////////
virtual ~LensFlare(){}
////////////////////////////////////////////////////////////
/// 設(shè)置鏡頭光位置
////////////////////////////////////////////////////////////
virtual void SetLocation(float x,float y,float z) = 0;
////////////////////////////////////////////////////////////
/// 設(shè)置主光節(jié)點(diǎn)顏色
////////////////////////////////////////////////////////////
virtual void SetMainNodeColor(const Color &maincolor) = 0;
////////////////////////////////////////////////////////////
/// 設(shè)置最后一個(gè)次光節(jié)點(diǎn)顏色
////////////////////////////////////////////////////////////
virtual void SetLastSubNodeColor(const Color &lastcolor) = 0;
////////////////////////////////////////////////////////////
/// 加入主光節(jié)點(diǎn)
////////////////////////////////////////////////////////////
virtual bool AddMainNode(float size,RefPtr<Texture> texture) = 0;
////////////////////////////////////////////////////////////
/// 加入次光節(jié)點(diǎn)
////////////////////////////////////////////////////////////
virtual bool AddSubNode(float size,float pos,RefPtr<Texture> texture) = 0;
////////////////////////////////////////////////////////////
/// 渲染函數(shù)
////////////////////////////////////////////////////////////
virtual void Render() = 0;
DECLARE_OBJECT(LensFlare)
};
可以看出鏡頭光繼承于可渲染對(duì)象也就是說(shuō)我們認(rèn)為鏡頭光是一種可渲染對(duì)象
它可以被啟用也可以使用Frustum做剔除處理
另外需要說(shuō)明的就是我們可以設(shè)置主光和末尾次光的顏色值
其余次光的顏色將使用其顏色的插值
下面是具體的測(cè)試代碼
移動(dòng)攝像機(jī)則鏡頭光會(huì)隨之改變方向
/*!==========================================================================
*
* 蓋莫游戲引擎(GaiMo Game Engine)
*
* 版權(quán)所有 (C) 2009-2009 成都蓋莫軟件技術(shù)工作室 保留所有權(quán)利
* Copyright (C) 成都蓋莫軟件技術(shù)工作室. All Rights Reserved.
*
* 了解更多情況,請(qǐng)?jiān)L問(wèn) http://www.gaimo.net
****************************************************************************/
//! 本例子主要測(cè)試蓋莫游戲引擎的鏡頭光功能
//! 2010.04.08
#include <GEngine/Gaimo.hpp>
using namespace core;
int Main()
{
//! 初始化引擎設(shè)備并得到設(shè)備指針
RefPtr<Device> device = InitDevice("鏡頭光");
//! 得到引擎場(chǎng)景指針
RefPtr<SceneManager> scenemanager = device->GetSceneManager();
//! 得到引擎資源指針
RefPtr<ResourceManager> resourcemanager = device->GetResourceManager();
//! 獲取圖形管理器指針
RefPtr<ImageManager> imagemanager = resourcemanager->GetImageManager();
//! 得到視頻驅(qū)動(dòng)器指針
RefPtr<VideoDriver> videodriver = device->GetVideoDriver();
//! 獲取文件系統(tǒng)指針
RefPtr<FileSystem> filesystem = device->GetFileSystem();
//! 設(shè)置文件加載路徑
filesystem->AddToSearchPath("..\\image\\lenflare.zip");
//! 獲取主光文件
RefPtr<core::ReadFile> mainlenfile = filesystem->OpenRead("hardglow.bmp");
//! 獲取次光文件
RefPtr<core::ReadFile> sublenfile = filesystem->OpenRead("halo.bmp");
//! 獲取主光圖形指針
RefPtr<Image> mainlenimage = imagemanager->CreateObject("mainlenimage",mainlenfile);
//! 獲取次光圖形指針
RefPtr<Image> sublenimage = imagemanager->CreateObject("sublenimage",sublenfile);
//! 獲取紋理管理器
RefPtr<TextureManager> texturemanager = resourcemanager->GetTextureManager();
//! 獲取主光紋理
RefPtr<Texture> maintexture = texturemanager->CreateTexture("maintexture",mainlenimage);
//! 獲取次光紋理
RefPtr<Texture> subtexture = texturemanager->CreateTexture("subtexture",sublenimage);
//! 獲取攝像機(jī)指針
RefPtr<Camera> camera = scenemanager->GetCameraManager()->CreateCamera("camera",
Vector3f(),
Vector3f(100,0,0));
camera->SetViewPort(Recti(0,0,640,480));
camera->SetPerspective(45.0f,640.0f/480.0f,0.1f,600.0f);
camera->Render();
//! 獲取和設(shè)置鏡頭光參數(shù)
RefPtr<LensFlare> lenflare = scenemanager->GetLenFlare();
//! 設(shè)置主光位置
lenflare->SetLocation(100,0,0);
//! 設(shè)置主光顏色
lenflare->SetMainNodeColor(core::Color(1.0,0.8,0.0,0.3));
//! 設(shè)置主光大小和紋理
lenflare->AddMainNode(64,maintexture);
//! 加載次光大小,位置和紋理
for(int i = 0; i < 12; i++)
lenflare->AddSubNode(18*(i%2+1),(i+1)/10.0f,subtexture);
lenflare->SetLastSubNodeColor(core::Color(0.0,0.8,0.5));
BEGIN_LOOP(device)
videodriver->SetClearBuffer(ENGINE_CLEAR_COLOR | ENGINE_CLEAR_DEPTH);
camera->SetPerspective(45.0f,640.0f/480.0f,0.1f,600.0f);
camera->Render();
lenflare->Render();
END_LOOP(device)
return 1;
}
代碼很多 但是也很容易理解不需要做什么解釋
下面是對(duì)應(yīng)的貼圖

這是使用蓋莫游戲引擎2.1.1的天空面功能
很簡(jiǎn)單的
先說(shuō)天空面描述符(引入這個(gè)的目的在于減少很多不相關(guān)的函數(shù)和代碼)
1 ////////////////////////////////////////////////////////
2 /// 定義引擎天空面描述符
3 ////////////////////////////////////////////////////////
4 struct SkyPlaneDesc
5 {
6 SkyPlaneDesc():divisions(32),
7 pradius(1200.0f),
8 aradius(1800.0f),
9 rate(2.5f),
10 axisx(0.0f),
11 axisy(1.0f),
12 axisz(0.0f)
13 {
14 }
15
16 ///////////////////////////////////////////////////////
17 /// 檢查描述符是否合法
18 ///////////////////////////////////////////////////////
19 bool IsValid()const
20 {
21 return image &&
22 divisions > 1 &&
23 pradius > 1.0f &&
24 aradius > 1.0f;
25 }
26
27 //! 天空面的圖形
28 RefPtr<Image> image;
29 int divisions;
30 float pradius;
31 float aradius;
32 //! 天空轉(zhuǎn)速(角度/秒)
33 float rate;
34 //! 天空旋轉(zhuǎn)軸
35 float axisx;
36 float axisy;
37 float axisz;
38
39 COPY_OBJECT(SkyPlaneDesc)
40 };
其中天空面參數(shù)有天空面分割數(shù)division
2個(gè)半徑(面半徑和空間半徑)
一個(gè)天空?qǐng)D形
4個(gè)關(guān)于旋轉(zhuǎn)的參數(shù)
下面是使用蓋莫游戲引擎天空面的例子如下所示:
 #include <GEngine/Gaimo.hpp>
using namespace std;
using namespace core;
int Main()


 {
{
 //! 初始化引擎設(shè)備并得到設(shè)備指針
RefPtr<Device> device = InitDevice("天空面測(cè)試");
//! 得到引擎場(chǎng)景指針
RefPtr<SceneManager> scenemanager = device->GetSceneManager();
//! 得到引擎資源指針
RefPtr<ResourceManager> resourcemanager = device->GetResourceManager();
//! 獲取圖形管理器指針
RefPtr<ImageManager> imagemanager = resourcemanager->GetImageManager();
//! 得到視頻驅(qū)動(dòng)器指針
RefPtr<VideoDriver> videodriver = device->GetVideoDriver();
//! 得到天空?qǐng)D形
RefPtr<core::Image> image = imagemanager->CreateObject("sky","..\\image\\sky\\top.jpg");
//! 得到天空盒指針
SkyPlaneDesc desc;
desc.image = image;
desc.divisions = 32;
desc.pradius = 1200.0f;
desc.aradius = 1800.0f;
RefPtr<Renderable> sky = scenemanager->CreateSkyPlane(desc);
//! 獲取攝像機(jī)指針
RefPtr<Camera> camera = scenemanager->GetCameraManager()->CreateCamera("camera",
Vector3f(),
Vector3f(100,13,0));
camera->SetViewPort(Recti(0,0,640,480));
camera->SetPerspective(45.0f,640.0f/480.0f,0.1f,600.0f);
//! 獲取霧指針
RefPtr<Fog> fog = resourcemanager->GetFog("..\\script//fog.lua","fog");
fog->Render();
BEGIN_LOOP(device)
videodriver->SetClearBuffer(ENGINE_CLEAR_COLOR | ENGINE_CLEAR_DEPTH);
camera->Render();
sky->Render();
END_LOOP(device)
return 0;
 }
}
代碼并沒有引入地形等其他不相關(guān)的東西
只是簡(jiǎn)單的天空面渲染
代碼雖然很多但是核心無(wú)非就是:
1 //! 得到天空盒指針
2 SkyPlaneDesc desc;
3 desc.image = image;
4 desc.divisions = 32;
5 desc.pradius = 1200.0f;
6 desc.aradius = 1800.0f;
7 RefPtr<Renderable> sky = scenemanager->CreateSkyPlane(desc);
8
9 //! 獲取攝像機(jī)指針
10 RefPtr<Camera> camera = scenemanager->GetCameraManager()->CreateCamera("camera",
11 Vector3f(),
12 Vector3f(100,13,0));
在循環(huán)過(guò)程中無(wú)非就是她的Render了
下面是貼圖:
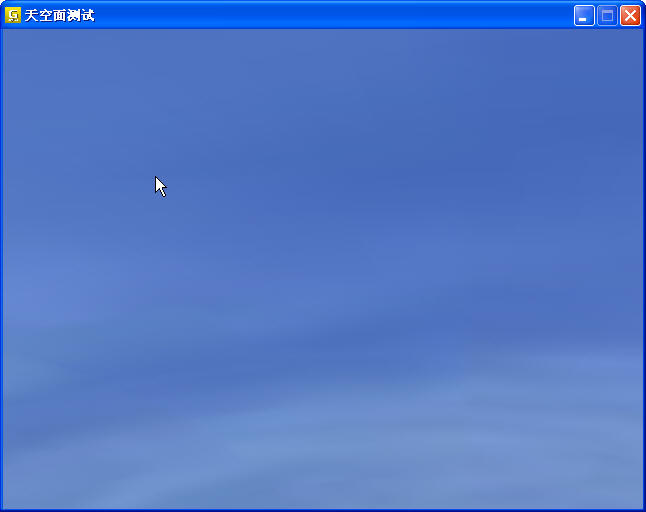
t天真的是蔚藍(lán)蔚藍(lán)的
/*!==========================================================================
*
* 蓋莫游戲引擎(GaiMo Game Engine)
*
* 版權(quán)所有 (C) 2009-2009 成都蓋莫軟件技術(shù)工作室 保留所有權(quán)利
* Copyright (C) 成都蓋莫軟件技術(shù)工作室. All Rights Reserved.
*
* 了解更多情況,請(qǐng)?jiān)L問(wèn) http://www.gaimo.net
****************************************************************************/
//! 本例子主要測(cè)試蓋莫游戲引擎的線程渲染和繪制基本2d幾何對(duì)象
//! 2010.04.08
#include <GEngine/Gaimo.hpp>
using namespace core;
using namespace ZThread;
Color color1(0.0f,0.5f,0.5f),color2(0.0f,1.0f,0.0f);
Color color3(1.0f,0.0f,0.0f),color4(1.0f,0.0f,1.0f);
Color color5(1.0f,1.0f,0.0f),color6(0.0f,1.0f,1.0f);
RefPtr<Device> device;
RefPtr<VideoDriver> videodriver;
void Render(bool flag);
//! 線程渲染類
class RenderThread : public Runnable
{
public:
RenderThread():flag(false){}
void run(){Render(flag);}
void Stop(){flag = true;}
private:
bool flag;
};
int Main()
{
device = core::InitDevice("線程渲染");
videodriver = device->GetVideoDriver();
videodriver->DetachRender();
RenderThread* render;
try
{
render = new RenderThread;
ZThread::Thread thread(render);
render->Stop();
}
catch(Synchronization_Exception& e)
{
std::cout<<e.what()<<std::endl;
}
BEGIN_LOOP(device)
END_LOOP(device)
return 1;
}
void Render(bool flag)
{
//! 獲取引擎資源管理器
core::RefPtr<core::ResourceManager> resmgr = device->GetResourceManager();
videodriver->AttachRender();
videodriver->Ortho2D();
videodriver->SetClearColor(core::Color::Blue);
BEGIN_LOOP(device)
videodriver->SetClearBuffer(GL_COLOR_BUFFER_BIT| GL_DEPTH_BUFFER_BIT);
//! 繪制矩形
videodriver->SetColor(color1);
videodriver->FillRect(100,120,50,50);
//! 繪制矩形
videodriver->SetColor(color2);
videodriver->DrawRect(100,180,50,50);
//! 繪制網(wǎng)格
videodriver->SetColor(color3);
videodriver->DrawGrid(Point(10,10),Point(20,20),Point(5,5));
//! 繪制變色矩形
//core::Render::DrawRaisedRectangle(libmath::Rect<float>(250,50,50,50),color5,color6);
//! 繪制三角形
videodriver->SetColor(color4);
//videodriver->DrawTriangle(Point(200,180),Point(200,270),Point(290,110),true);
//! 繪制點(diǎn)
videodriver->DrawPoint(Point(200,120));
RETURN_LOOP(flag,true)
END_LOOP(device);
}
這是使用蓋莫游戲引擎2.1.1線程渲染的例子
由于比較簡(jiǎn)單這里就不提圖片了(免得浪費(fèi)空間)
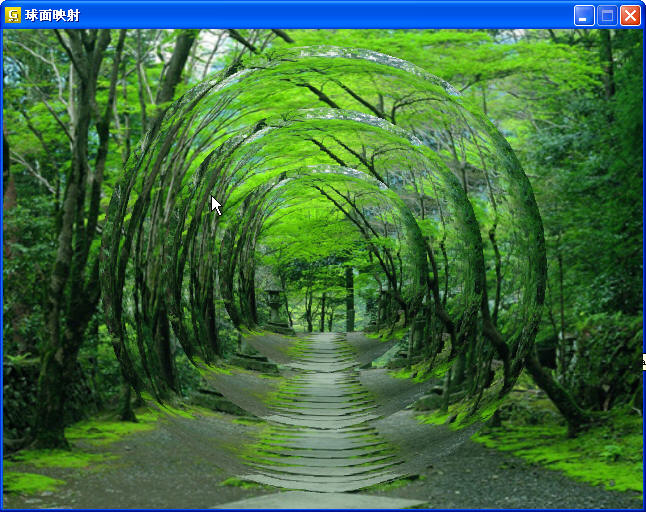
這是使用蓋莫游戲引擎2.1.1做的簡(jiǎn)單球面映射
比較簡(jiǎn)單的不說(shuō)什么
獻(xiàn)上貼圖:
再上代碼
1 using namespace std;
2 using namespace core;
3
4 int main(int argc, char **argv)
5 {
6 //! 初始化引擎設(shè)備并得到設(shè)備指針
7 RefPtr<Device> device = core::InitDevice("球面映射");
8 //! 得到引擎場(chǎng)景指針
9 RefPtr<SceneManager> scenemanager = device->GetSceneManager();
10 //! 得到引擎資源指針
11 RefPtr<ResourceManager> resourcemanager = device->GetResourceManager();
12 //! 獲取引擎紋理管理器指針
13 RefPtr<TextureManager> texturemanager = resourcemanager->GetTextureManager();
14 //! 獲取引擎圖形管理器
15 RefPtr<ImageManager> imagemanager = resourcemanager->GetImageManager();
16 //! 獲取引擎視頻驅(qū)動(dòng)器
17 RefPtr<VideoDriver> videodriver = device->GetVideoDriver();
18
19 //! 得到圖形和其紋理
20 core::RefPtr<Image> image1 = imagemanager->CreateObject("background","..\\image//spheremap//tree.jpg");
21 core::RefPtr<Texture> background = texturemanager->CreateObject("background",image1);
22
23 core::RefPtr<Image> image2 = imagemanager->CreateObject("reflect","..\\image//spheremap//tree1.jpg");
24 core::RefPtr<Texture> reflect = texturemanager->CreateSphereMap("reflect",image2);
25
26 background->Generate();
27 reflect->Generate();
28
29 //! 獲取全局?jǐn)z像機(jī),設(shè)置攝像機(jī)參數(shù)
30 core::RefPtr<core::Camera> camera = scenemanager->GetActiveCamera();
31 camera->SetPosition(Vector3f(0,0,30));
32 camera->SetView(Vector3f(0,0,0));
33 camera->SetDirection(Vector3f(0,1,0));
34 camera->SetViewPort(Recti(0,0,640,480));
35 camera->SetPerspective(50.0f,640.0f/480.0f,0.1f,1000.0f);
36 videodriver->EnableCulling();
37
38 BEGIN_LOOP(device)
39 videodriver->SetClearBuffer(ENGINE_CLEAR_COLOR | ENGINE_CLEAR_DEPTH);
40 videodriver->SetClearColor(core::Color::Blue);
41 camera->Render();
42
43 background->AttachRenderTarget();
44 glBegin(GL_QUADS);
45 glNormal3f( 0.0f, 0.0f, 1.0f);
46 glTexCoord2f(0.0f, 0.0f); glVertex3f(-13.0f, -12.0f, 10.0f);
47 glTexCoord2f(1.0f, 0.0f); glVertex3f( 13.0f, -12.0f, 10.0f);
48 glTexCoord2f(1.0f, 1.0f); glVertex3f( 13.0f, 12.0f, 10.0f);
49 glTexCoord2f(0.0f, 1.0f); glVertex3f(-13.0f, 12.0f, 10.0f);
50 glEnd();
51
52 reflect->AttachRenderTarget();
53 videodriver->RenderSphere(12,32,32);
54 videodriver->RenderSphere(9,32,32);
55 videodriver->RenderSphere(6,32,32);
56 reflect->Destroy();
57 END_LOOP(device)
58
59 return 0;
60 }
題外話:截止目前引擎支持2d紋理,球面映射和立方體紋理
其它相關(guān)的映射和紋理會(huì)陸續(xù)加入
摘要: 今天突然想給引擎加入一個(gè)新的功能那就是使用多線程載入資源如果游戲資源過(guò)多,而只采用一個(gè)線程載入資源顯然是不夠的
所以就加入這個(gè)功能吧設(shè)計(jì)代碼有:1.資源基類
1 //////////////////////////////////////////////////////////// 2 /// 定義資源基類 3&nb...
閱讀全文
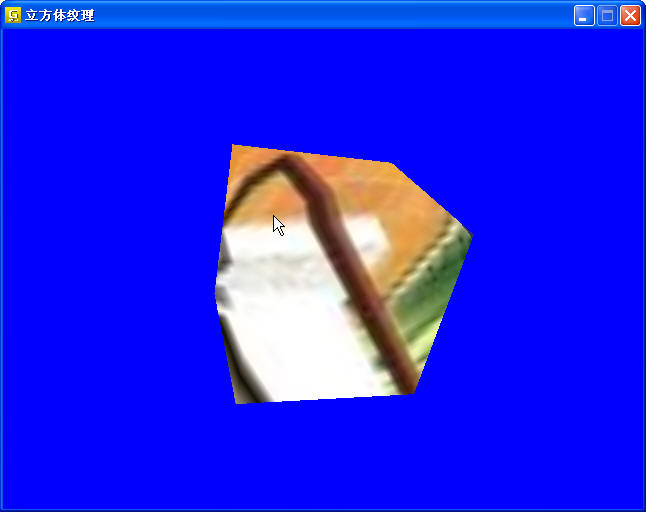
這是蓋莫游戲引擎的立方體紋理一例
代碼如下:
1 //! 2010.03.03
2 /////////////////////////////////////////////////////
3 /// 蓋莫游戲引擎的立方體繪制
4 /////////////////////////////////////////////////////
5 //! 測(cè)試立方體繪制函數(shù),矩陣,輸入輸出
6 //! 按鍵f1,f2,f3旋轉(zhuǎn)立方體
7 #include <GEngine/Gaimo.hpp>
8
9 #define BOX_SIDE (12.0)
10 using namespace std;
11 using namespace core;
12 Matrix4f mat;
13
14 //! 處理鼠標(biāo)響應(yīng)
15 void MouseCheck(core::RefPtr<core::Input> input);
16
17 int main(int argc, char **argv)
18 {
19 //! 初始化引擎設(shè)備并得到設(shè)備指針
20 RefPtr<Device> device = core::InitDevice("立方體紋理");
21 //! 得到引擎場(chǎng)景指針
22 RefPtr<SceneManager> scenemanager = device->GetSceneManager();
23 //! 得到引擎資源指針
24 RefPtr<ResourceManager> resourcemanager = device->GetResourceManager();
25 //! 獲取引擎紋理管理器指針
26 RefPtr<TextureManager> texturemanager = resourcemanager->GetTextureManager();
27 //! 獲取引擎圖形管理器
28 RefPtr<ImageManager> imagemanager = resourcemanager->GetImageManager();
29 //! 獲取引擎視頻驅(qū)動(dòng)器
30 RefPtr<VideoDriver> videodriver = device->GetVideoDriver();
31 //! 獲取文件系統(tǒng)指針
32 RefPtr<FileSystem> filesystem = device->GetFileSystem();
33 filesystem->AddToSearchPath("..\\image//cubemap.zip");
34
35 //! 得到tile圖形和其紋理
36 core::RefPtr<Image> image1 = imagemanager->CreateObject("cube1",filesystem->OpenRead("cm_front.png"));
37 CHECK_PTR_PRINT(image1,"bad image1");
38 core::RefPtr<Image> image2 = imagemanager->CreateObject("cube2",filesystem->OpenRead("cm_back.png"));
39 CHECK_PTR_PRINT(image2,"bad image2");
40 core::RefPtr<Image> image3 = imagemanager->CreateObject("cube3",filesystem->OpenRead("cm_left.png"));
41 CHECK_PTR_PRINT(image3,"bad image3");
42 core::RefPtr<Image> image4 = imagemanager->CreateObject("cube4",filesystem->OpenRead("cm_right.png"));
43 CHECK_PTR_PRINT(image4,"bad image4");
44 core::RefPtr<Image> image5 = imagemanager->CreateObject("cube5",filesystem->OpenRead("cm_top.png"));
45 CHECK_PTR_PRINT(image5,"bad image5");
46 core::RefPtr<Image> image6 = imagemanager->CreateObject("cube6",filesystem->OpenRead("cm_bottom.png"));
47 CHECK_PTR_PRINT(image6,"bad image6");
48 core::RefPtr<Texture> cubemap = texturemanager->CreateCubeMap("cubemap",image1,image2,image3,image4,image5,image6);
49 cubemap->Generate();
50
51 //! 獲取全局?jǐn)z像機(jī),設(shè)置攝像機(jī)參數(shù)
52 core::RefPtr<core::Camera> camera = scenemanager->GetActiveCamera();
53 camera->SetPosition(Vector3f(20,20,20));
54 camera->SetView(Vector3f(0,0,0));
55 camera->SetDirection(Vector3f(0,1,0));
56
57 camera->SetViewPort(Recti(0,0,640,480));
58 camera->SetPerspective(50.0f,640.0f/480.0f,0.1f,1000.0f);
59 videodriver->EnableCulling();
60
61 float sides[] = {BOX_SIDE,BOX_SIDE,BOX_SIDE};
62 float pos[] = {0,0,0};
63 BEGIN_LOOP(device)
64 videodriver->SetClearBuffer(ENGINE_CLEAR_COLOR | ENGINE_CLEAR_DEPTH);
65 videodriver->SetClearColor(core::Color::Blue);
66 camera->Render();
67 MouseCheck(device->GetInput());
68 cubemap->AttachRenderTarget();
69 videodriver->RenderCube(pos,mat.ptr(),sides);
70 END_LOOP(device)
71
72 return 0;
73 }
74
75 //! 處理鼠標(biāo)響應(yīng)
76 void MouseCheck(core::RefPtr<core::Input> input)
77 {
78 if(input->IsPressedKey(KEY_F1))
79 {
80 mat*=mat.Rotate((rand()%200)/1200.0f,1,0,0);
81 }
82 else if(input->IsPressedKey(KEY_F2))
83 {
84 mat*=mat.Rotate((rand()%200)/1200.0f,0,1,0);
85 }
86 else if(input->IsPressedKey(KEY_F3))
87 {
88 mat*=mat.Rotate((rand()%200)/1200.0f,0,0,1);
89 }
90 }
91
92
93
具體的使用方法就是從設(shè)備指針中獲取資源管理器指針
然后從資源管理器獲取紋理管理器指針
之后調(diào)用CreateCubeMap();傳入6個(gè)圖形指針即可
之后調(diào)用成員函數(shù)Generate函數(shù)
在使用的時(shí)候調(diào)用AttachRenderTarget綁定當(dāng)前紋理即可使用很方便吧
下面是具體的貼圖:
根據(jù)Loki的CheckReturn所說(shuō):
1 /// C++ provides no mechanism within the language itself to force code to
2 /// check the return value from a function call. This simple class provides
3 /// a mechanism by which programmers can force calling functions to check the
4 /// return value. Or at least make them consciously choose to disregard the
5 /// return value. If the calling function fails to use or store the return
6 /// value, the destructor calls the OnError policy.
c++并沒有提供內(nèi)置的機(jī)制去強(qiáng)制檢測(cè)函數(shù)返回值.
loki提供的簡(jiǎn)單類CheckReturn提供了簡(jiǎn)單的機(jī)制去保證函數(shù)檢測(cè)返回值
當(dāng)然可以使用定制的模板制定沒有檢測(cè)函數(shù)返回值時(shí)的處理策略
1.CheckReturn的處理策略(內(nèi)置)
1 template<class T>
2 struct IgnoreReturnValue
3 {
4 static void run(const T&)
5 {
6 /// Do nothing at all.
7 }
8 };
9
10 template<class T>
11 struct ThrowTheValue
12 {
13 static void run(const T & value )
14 {
15 throw value;
16 }
17 };
18
19 template<class T>
20 struct ThrowLogicError
21 {
22 static void run( const T & )
23 {
24 throw ::std::logic_error( "CheckReturn: return value was not checked.\n" );
25 }
26 };
27
28 template<class T>
29 struct TriggerAssert
30 {
31 static void run(const T&)
32 {
33 assert( 0 );
34 }
35 };
36
37 template<class T>
38 struct FprintfStderr
39 {
40 static void run(const T&)
41 {
42 fprintf(stderr, "CheckReturn: return value was not checked.\n");
43 }
44 };
可以看出對(duì)于軟件開發(fā)
在release代碼中我們可以使用IgnoreReturnValue
在debug代碼中我們可以使用ThrowLogicError來(lái)顯示沒有檢測(cè)函數(shù)返回值
在CheckReturn類的實(shí)現(xiàn)如下:
1 template < class Value , template<class> class OnError = TriggerAssert >
2 class CheckReturn
3 {
4 public:
5
6 /// Conversion constructor changes Value type to CheckReturn type.
7 inline CheckReturn( const Value & value ) :
8 m_value( value ), m_checked( false ) {}
9
10 /// Copy-constructor allows functions to call another function within the
11 /// return statement. The other CheckReturn's m_checked flag is set since
12 /// its duty has been passed to the m_checked flag in this one.
13 inline CheckReturn( const CheckReturn & that ) :
14 m_value( that.m_value ), m_checked( false )
15 { that.m_checked = true; }
16
17 /// Destructor checks if return value was used.
18 inline ~CheckReturn( void )
19 {
20 // If m_checked is false, then a function failed to check the
21 // return value from a function call.
22 if (!m_checked)
23 OnError<Value>::run(m_value);
24 }
25
26 /// Conversion operator changes CheckReturn back to Value type.
27 inline operator Value ( void )
28 {
29 m_checked = true;
30 return m_value;
31 }
32
33 private:
34 /// Default constructor not implemented.
35 CheckReturn( void );
36
37 /// Copy-assignment operator not implemented.
38 CheckReturn & operator = ( const CheckReturn & that );
39
40 /// Copy of returned value.
41 Value m_value;
42
43 /// Flag for whether calling function checked return value yet.
44 mutable bool m_checked;
45 };
首先它提供了一個(gè)bool變量來(lái)存儲(chǔ)是否檢查了函數(shù)返回值
如果CheckReturn r(value);r()一下則說(shuō)明檢查了函數(shù)返回值(非常有利于軟件測(cè)試)
當(dāng)然檢測(cè)返回值的時(shí)期發(fā)生在其析構(gòu)過(guò)程中
另外該類不允許對(duì)象的默認(rèn)構(gòu)造
下面給出一個(gè)簡(jiǎn)單的使用例子:
1 #include <loki/CheckReturn.h>
2
3 using namespace std;
4 using namespace Loki;
5
6 //#define G_DEBUG
7
8 #ifndef G_DEBUG
9 typedef CheckReturn<int,FprintfStderr> CheckInt;
10 #else
11 typedef CheckReturn<int,IgnoreReturnValue> CheckInt;
12 #endif
13
14 int main(int argc, char *argv[])
15 {
16 int i = 0;
17 {
18 CheckInt check(i);
19 }
20
21 system("PAUSE");
22 return EXIT_SUCCESS;
23 }
如果我們定義了宏G_DEBUG則表明這是debug模式
附注:以前早早就接觸到了loki,以前也翻過(guò)c++設(shè)計(jì)新思維
不過(guò)想起來(lái)還是看其源碼和其自帶的使用例子
關(guān)于loki庫(kù)我想寫多篇分析其庫(kù)的短小精悍的例子
摘要: 這是蓋莫引擎AABB3的設(shè)計(jì) 主要參考了幾個(gè)引擎代碼這個(gè)并沒有太多需要說(shuō)明的唯一要說(shuō)的就是使用給定矩陣變換AABB3代碼如下:
Code highlighting produced by Actipro CodeHighlighter (freeware)http://www.CodeHighlighter.com/--> 1 //////////////////...
閱讀全文
引擎的場(chǎng)景這塊我一直是寫了,刪除,再寫,一直感覺不太滿意
本想著做成irr那種父節(jié)點(diǎn)-子場(chǎng)景的形式
一是感覺過(guò)于復(fù)雜
二則都這個(gè)不是理解的很到位
所以感覺寫還是簡(jiǎn)單吧
修改起來(lái)也比較容易
具體的Renderable如下:
1 ///////////////////////////////////////////////////////
2 /// 定義引擎可渲染對(duì)象基類
3 ///////////////////////////////////////////////////////
4 class Renderable : public Object
5 {
6 public:
7 ///////////////////////////////////////////////////////
8 /// 構(gòu)造,析構(gòu)可渲染對(duì)象
9 ///////////////////////////////////////////////////////
10 Renderable();
11 Renderable(bool visible,bool auto_culling = false):
12 visible(visible),
13 auto_culling(auto_culling)
14 {
15 }
16 virtual ~Renderable(){}
17 public:
18 ///////////////////////////////////////////////////////
19 /// 設(shè)置,獲取是否渲染(顯示)場(chǎng)景
20 ///////////////////////////////////////////////////////
21 void SetVisible(bool visible){this->visible = visible;}
22 void EnableVisible(){visible = true;}
23 void DisableVisible(){visible = false;}
24 bool IsVisible()const{return visible;}
25
26 ///////////////////////////////////////////////////////
27 /// 設(shè)置,獲取是否自動(dòng)調(diào)用視錐體剔除
28 ///////////////////////////////////////////////////////
29 void SetAutoCulling(bool auto_cull){this->auto_culling = auto_cull;}
30 bool IsAutoCulling()const{return auto_culling;}
31
32 ///////////////////////////////////////////////////////
33 /// 設(shè)置,獲取對(duì)象的平移
34 ///////////////////////////////////////////////////////
35 /*void SetTranslate(const Vector3f &offset){this->offset = offset;}
36 Vector3f GetTranslate()const{return offset;}
37
38 ///////////////////////////////////////////////////////
39 /// 設(shè)置,獲取對(duì)象的平旋轉(zhuǎn)(角度)
40 ///////////////////////////////////////////////////////
41 void SetRotate(const Vector3f &rot){this->rotate = rot;}
42 Vector3f GetRotate()const{return rotate;}
43
44 ///////////////////////////////////////////////////////
45 /// 設(shè)置,獲取對(duì)象的縮放
46 ///////////////////////////////////////////////////////
47 void SetScale(const Vector3f &scale){this->scale = scale;}
48 Vector3f GetScale()const{return scale;}*/
49
50 ///////////////////////////////////////////////////////
51 /// 獲取可渲染物體是否在視錐體內(nèi)
52 ///////////////////////////////////////////////////////
53 virtual bool IsInFrustum()const{return true;}
54
55 ///////////////////////////////////////////////////////
56 /// 渲染函數(shù)
57 ///////////////////////////////////////////////////////
58 //! virtual void BeginRender() = 0;
59 virtual void Render() = 0;
60 //! virtual void AfterRender() = 0;
61 protected:
62 bool visible;
63 bool auto_culling;
64 //Vector3f offset;
65 //Vector3f scale;
66 //Vector3f rotate;
67
68 DECLARE_OBJECT(Renderable)
69 };
70
Renderable是一切可渲染對(duì)象的基類
它提供了以下幾個(gè)功能:
1.渲染
2.檢測(cè)對(duì)象是否在視錐體內(nèi)(默認(rèn)總是true)
3.設(shè)置對(duì)象的可視狀態(tài)和檢索
4.設(shè)置是否自動(dòng)調(diào)用自剔除功能
然后在具體的場(chǎng)景對(duì)象中可以處理如下:
1.如果是天空盒之類則其總是視錐體內(nèi)的
2.如果是光材質(zhì)霧之類的對(duì)象則其可顯示變?yōu)閱⒂?br>3.如果對(duì)象為md2模型之類則從Renderable下面再弄一個(gè)子類