結束了兩個星期的用trace進行SmartFoxserver Extension調試的痛苦歷史之后,我決定再來嘗試一下怎么在IED環境下進行遠程調試。
上一次打算在Eclipse下進行,不知道哪一個環節出錯,沒能成功,這次改用NetBeans吧,正好趕上NetBeans新版本發布,來試用一次。
按照這里描述的方法,很快把Eclipse下創建的工程導入到了NetBeans下,不過遇到了點小問題,一堆的亂碼。檢查了下發現,Eclipse下創建的文件編碼為ANSI,在NetBeans下不識別其中的中文注釋,把文件改成UTF-8后問題解決,可后來我再試圖在Eclipse下打開這些文件時問題又出現了,Eclipse只識別ANSI編碼的文件?似乎不大可能吧,不過一時也沒找到解決方法,暫時放棄,改用NetBeans吧。
按照論壇上的方法做就行,不過可能因為版本更新的原因,實際做的時候還是有點差別
Step 1
Download the Netbeans IDE for java development. (47mb SE version should be fine!)
這一步就是這樣了
Step 2
Install and open Netbeans. Create a project from existing java source pointing to where your extensions are. Should be placed in src subfolder to be nice.
(I for sure could not make it work if the source was not in a subfolder)
Right click on project and choose properties->libraries. Add all jar files from your smartfox installation lib dir.
在NetBeans下導入原來Eclipse創建的文件,只需要src目錄即可
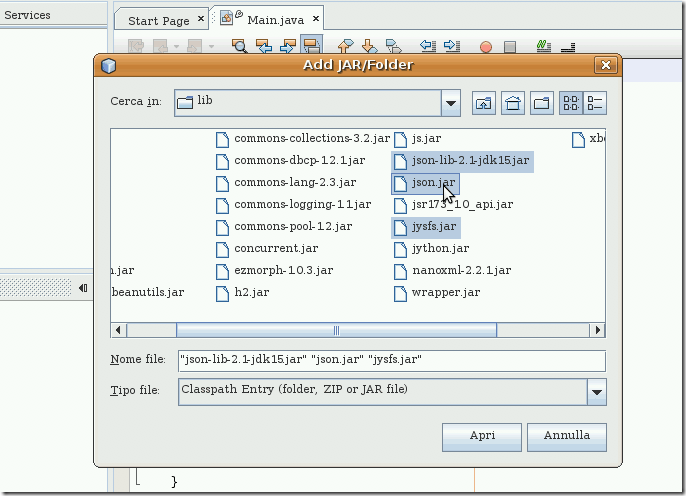
導入libraries時注意,按照這里的方法,只需要導入3個jar文件,就是這樣

Step 3
Goto Files tab. Expand nbbuild.xml. Click on -post-compile target.
Copy and paste the following code: (Note: adjust todir to point to your smartfox program extension directory)
<copy todir="C:\Programmer\SmartFoxServerPRO_1.6.6\Server\javaExtensions">
<fileset dir="${build.dir}/classes/"/>
</copy>
我的NetBeans下沒有nbbuild.xml,倒是有一個build.xml,不過里面沒內容 
再看了下,原來引用的build-impl.xml,上面有個簡單的介紹,在build.xml里添加如下內容即可:
<target name="-post-compile">
<copy todir="D:\SmartFoxServer\Server\javaExtensions">
<fileset dir="${build.dir}/classes/"/>
</copy>
</target>
根據你的SmartFoxServer安裝目錄進行修改即可
Step 4
Create a new batchfile called SmartFoxDebug?.bat
Copy and paste the following content into it: (Again adjust to your installation directory)
C:\Programmer\SmartFoxServerPRO_1.6.6\Server\wrapper.exe -c "C:\Programmer\SmartFoxServerPRO_1.6.6\Server\conf\wrapper.conf"
這一步不需要,在我安裝的目錄下直接有個smarfoxService.bat批處理文件,用它就行了
Step 5
Add the following lines to your wrapper.conf
Code:
# runtimedebug
wrapper.java.additional.3=-Xdebug
wrapper.java.additional.4=-Xnoagent
wrapper.java.additional.5=-Xrunjdwp:transport=dt_socket,address=8888,server=y,suspend=n
這里的意思是要在SmartFoxServer里開戶遠程調試的監聽,在我安裝的SFS版本里原來比這多了一項配置,所以最終是這樣的:
# Java Additional Parameters
wrapper.java.additional.1=-server
wrapper.java.additional.2=-Dfile.encoding=UTF-8
wrapper.java.additional.3=-Djava.util.logging.config.file=logging.properties
wrapper.java.additional.4=-Xdebug
wrapper.java.additional.5=-Xnoagent
wrapper.java.additional.6=-Xrunjdwp:transport=dt_socket,address=8787,server=y,suspend=n
Step 6
Choose Run->Build main project (F11) in Netbeans.
If build is ok, click the batch file. Now select debug->attach debugger and choose port 8888. Debugger console should say "User program running".
Now you can place breakpoints and trigger your extensions normally.
這里就是最終我們要實現的效果了,掛接SmartFoxServer的遠程JVM進行調試,配置項在 調試(D) 下的 連接調試器(A) ,如果你跟我一樣安裝的是中文版NetBeans的話 
貼張圖,就是這樣,注意端口號,是上面配置的那個,不是SFS對客戶端連接的監聽商品號9393哦

好了,先啟動SFS,用上面說的那個批處理文件,你會看到一行提示信息,JVM遠程調試的監聽已打開
然后連接調試器
在NetBeans里打個斷點看看,O了